
In the 1700s magicians used many different optical effects within their performances to fool and entertain their audiences. One of the most used effects during this time was known as ‘spiritism’, or ‘the summoning of the dead’
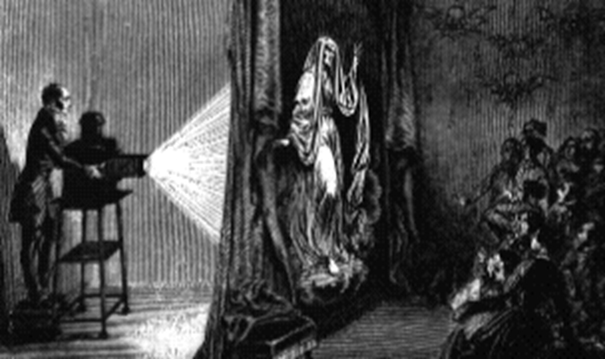
An image is projected onto the back side of a light fabric material capable of billowing movement. The material is moved which deforms the projection, and thereby creating the illusion that the subject is moving. The principle of relevance here is that a projected 2D image will take the form of a 3D surface onto which it is projected.
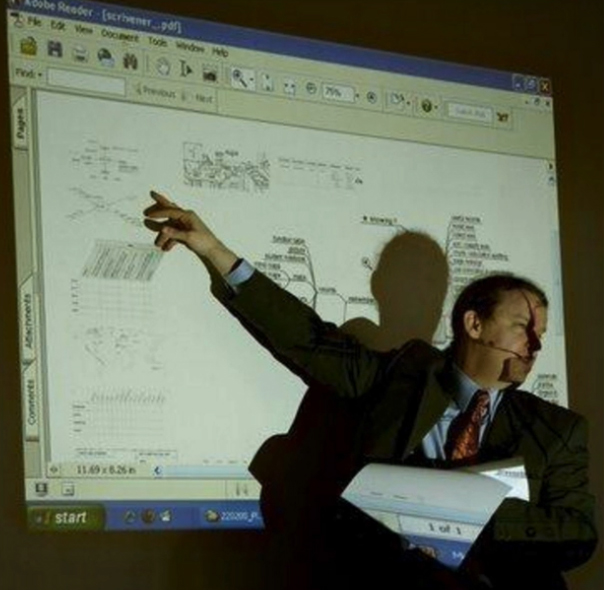
A second example can be seen in this image showing a presentation utilising a ‘front projection’ device and flat screen. We can see that the 2D projection retains its 2D form where is projects onto the flat surface. However, where the image intersects the tutor, it inherits his 3D form (i.e. across the face) and deforms accordingly.
This simple concept is central to this study but requires some contextualisation.
A definition can be found in David Mattingly’s book titled The Digital Matte Painting Handbook. He describes camera projection as a process by which images that are shined “…onto blank 3D forms are shaped to match the elements in the image.” He goes on to suggest that “The magic occurs when the scene is re-photographed using a moving camera while leaving the projector in the same spot. It will look as though the painting has come to life in full 3D.” (2011, p.157)
So this is a method by which 3D objects can be textured. A camera is used as a projector to shine a texture (painting or photographic image) onto a 3D surface. This camera remains in a fixed position, or at least fixed relative to the object onto which it is projecting. This camera is invisible to the viewing audience and they have no knowledge of its existence.
Ultimately the image must be presented to the audience through the prism of a camera lens and, in the case of this technique, is an additional camera, which we will call the ‘shot camera’. It is this camera to which movement and optical effects are applied and from which the final shot is rendered for inclusion in a film or television sequence.
As the camera moves, the 3D geometry onto which the texture is projected, will change perspective, position and scale. Moreover the relationship between the geometry, and other 3D objects or elements, within the view of the shot camera, will be apparent.
This emulates the conditions and principles of Parallax, defined in the Oxford English Dictionary as the “Apparent displacement, or difference in the apparent position, of an object, caused by actual change (or difference) of position of the point of observation.” (1989)
A nice explanation can be found here:
In terms of digital environment, we can simply consider parallax to be a presentation of relative visible movement between objects to the shot camera. Objects further away have the least amount of parallax whereas closest objects have the most parallax.
This has, and continues to become, an important consideration for the matte painter. Historically, and even as late as the 1980’s, the presentation of matte paintings in films did not use demanding camera moves; they were either static shots or gentle dolly moves. Consequently the matte painter could provide a flat 2D image and this would be quite acceptable.
However, in modern films, it is much less common to see these type of camera moves. Conversely we are much more accustomed to see dynamic camera moves in which the camera sweeps through an environment, exposing a large amount of parallax.
Production Tools
A number of 3D software applications offer camera projection capabilities to the matte painter:
- Maya
- Nuke
- 3DS Max
- SoftImage
- Cinema 4D
- Blender
- Houdini
Nuke is essentially a compositing application with 3D and projection capabilities. Consequently the majority of camera projected matte paintings utilise this application, primarily due to its lightweight yet powerful projection tools. However, because Nuke is not an optimised 3D application, there will be situations where the density of the geometry, or requirement for specific shaders, will necessitate the use of a fully-fledged 3D application.
The Elements of Camera Projection
Irrespective of which software is used, camera projection requires the same elements:
Matte Painting
The 2D image to be projected. This may be a single image, or broken up into several layers. It could also be a combination of several matte paintings to be projected from different cameras.
Shot Camera
The camera, which will be used to render the final shot to be used in the film sequence. This is configured to meet the cinematic requirements of the shot through its optical and animation controls.
Projection Camera
The camera that is projecting the matte painting onto a geometric surface or surfaces. It usually, but not always, is derived from the position of the shot camera on an optimum frame but any animation of optical or transformation parameters is removed so the camera is fixed and static.
3D Geometry
This is the 3D surface on which the matte painting will be projected. This is critical to creating the illusion of parallax.
At the simplest level, this can be flat 2D planar surfaces (cards) placed at different positions in 3D space and, at the most complex, can be a 3D space consisting of complex and intricate polygon models.
Projection Shader
This is the conduit that connects the matte painting, the geometry and the projection camera together
The following is a short video tutorial for visual effects students on how to construct a camera projection setup in NUKE using the elements outlined abov
The following is a short video tutorial for visual effects students on how to construct a camera projection setup in Maya using the elements outlined above
